How to Change AutoPlay Settings in Windows 11
AutoPlay is a feature that lets Windows automatically detect when you plug in a USB drive, memory card, or other media. It then asks you what you want to do.
Why? You might want to change this to stop unwanted programs from running or to make your workflow faster.
What happens? When you change these settings, Windows will either ignore the device, open it automatically, or ask you for instructions.
Why is AutoPlay a security risk?
AutoPlay can be a security risk because it allows programs on a USB drive or memory card to run automatically the moment you plug them in. If a drive contains malicious software, it could infect your computer without your permission. Disabling AutoPlay prevents these files from executing, adding a layer of protection to your system.
Change AutoPlay Settings Using System Settings
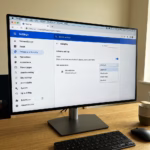
The easiest way to change AutoPlay settings is through Windows Settings. Here is how:
- Press Windows key + I on your keyboard to open Settings.
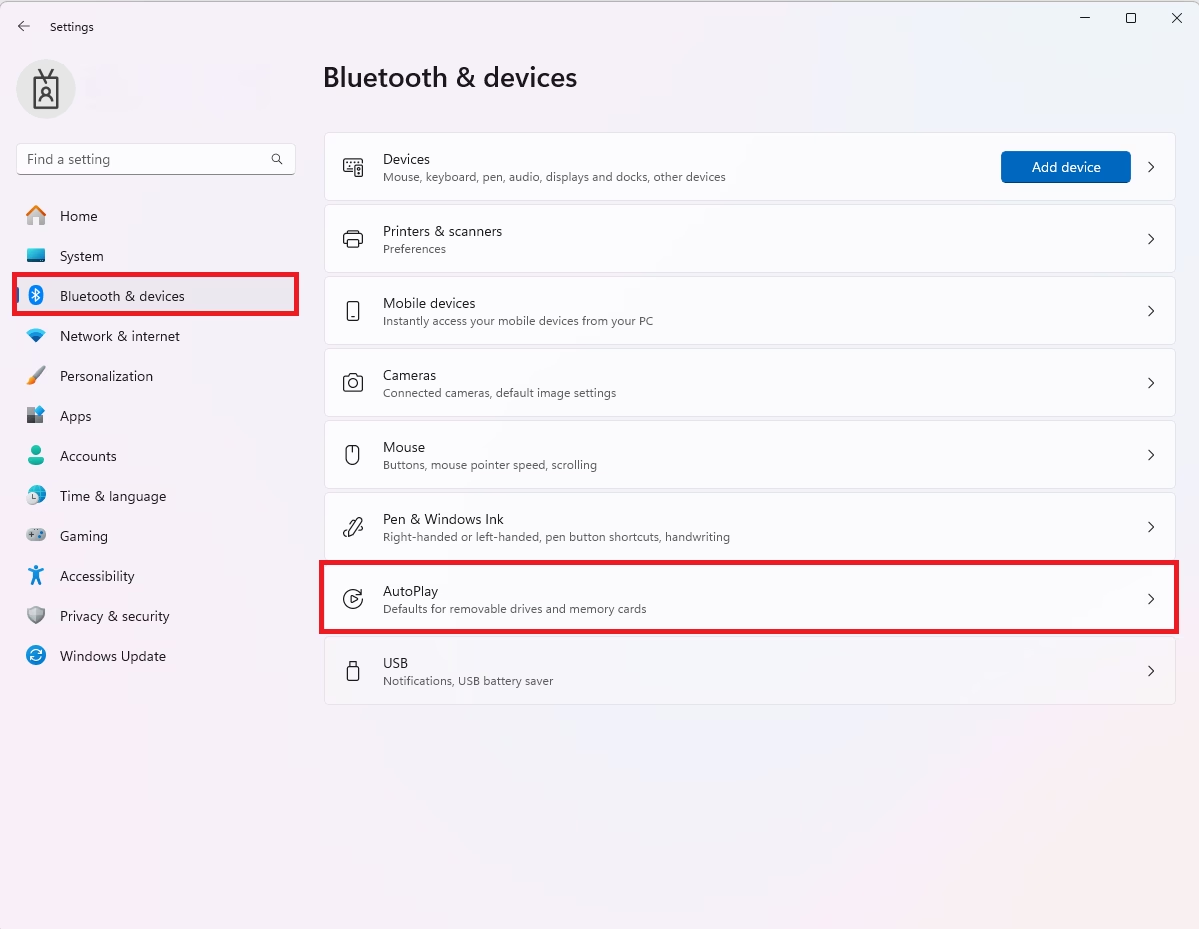
- In Settings, click on Bluetooth & devices in the left menu.
- On the right side, select AutoPlay.
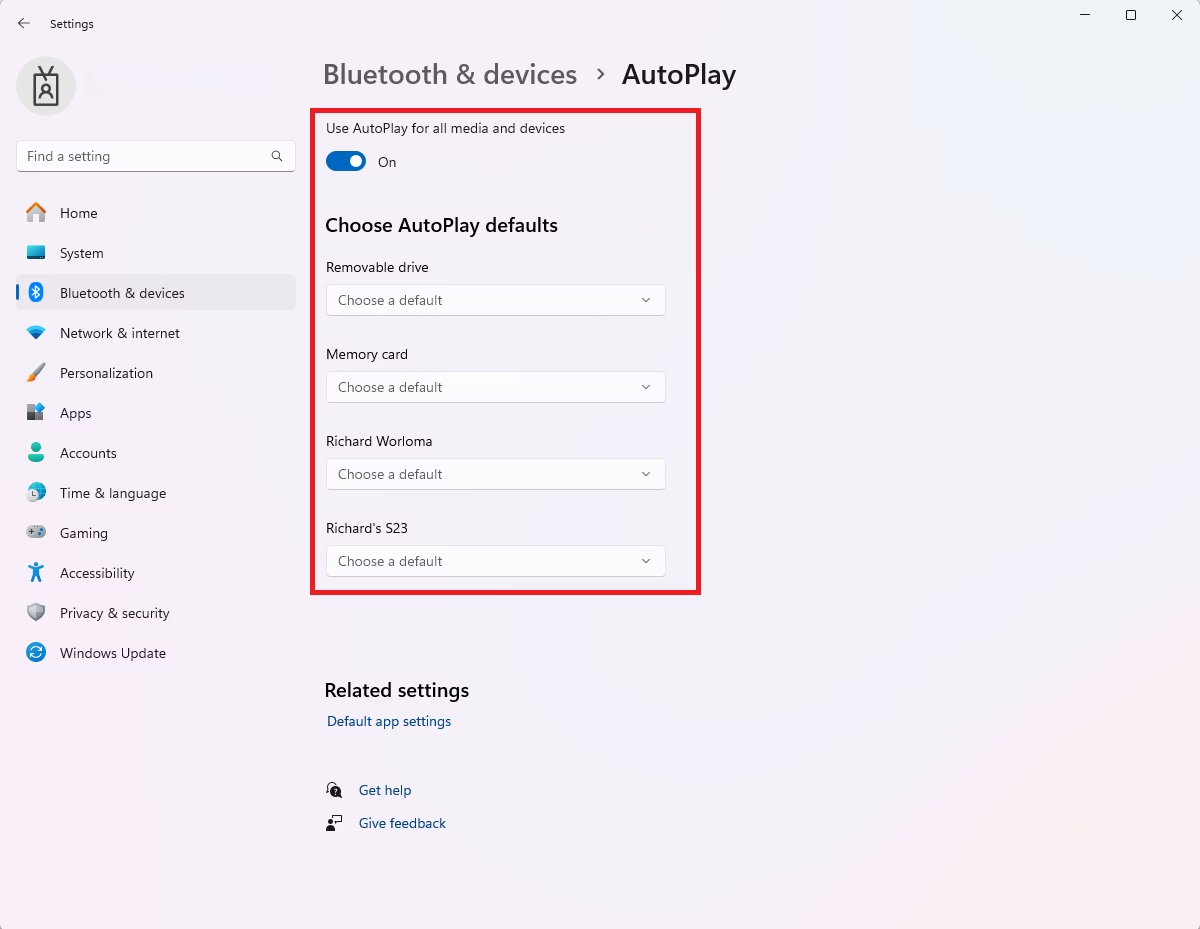
Turn Off AutoPlay Completely
If you want to disable AutoPlay entirely, toggle the button under Use AutoPlay for all media and devices to the Off position. What happens? Windows will no longer react to plugged-in media, and you must open your files manually using File Explorer.
Change AutoPlay Settings Using Control Panel
You can also adjust AutoPlay settings through Control Panel for more detailed control.
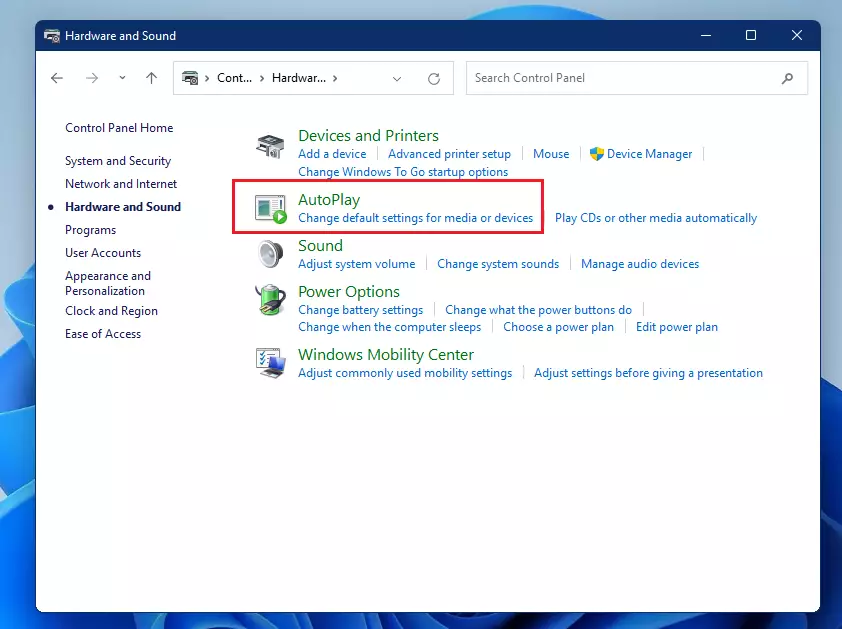
- Click the Start button and search for Control Panel.
- Click on Hardware and Sound.
- Select AutoPlay.
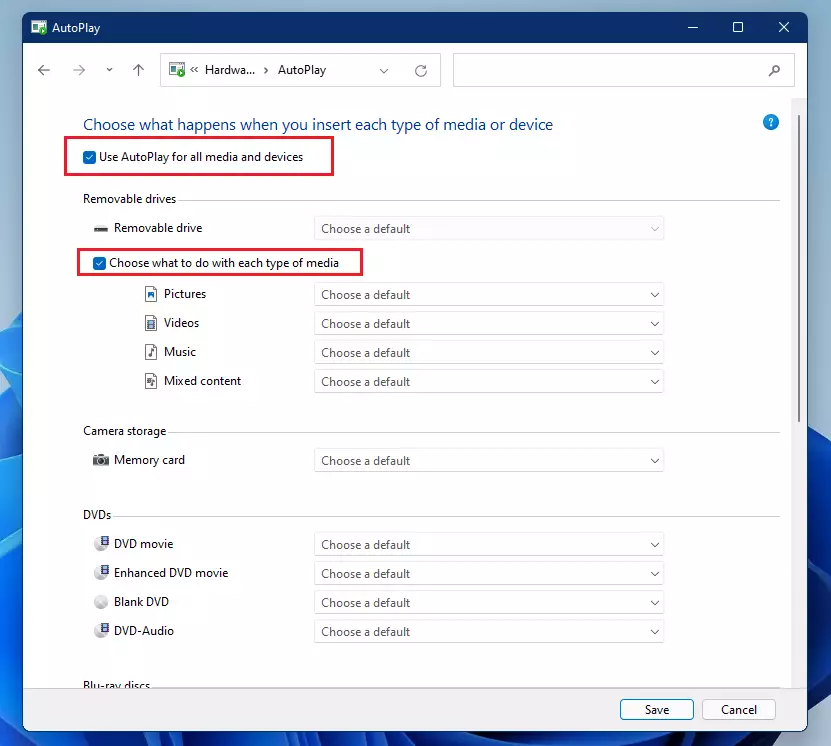
In this window, you can set specific actions for different media and device types. Choose what should happen for each one, then click Apply and OK to save your changes.
Advanced: Disable AutoPlay via Registry Editor
Warning: This step requires admin privileges and involves editing the registry. Incorrect changes can cause system issues.
- Press Windows key + R, type regedit, and press Enter.
- Navigate to: HKEY_CURRENT_USER\Software\Microsoft\Windows\CurrentVersion\Policies\Explorer
- If the key NoDriveTypeAutoRun does not exist, right-click in the right pane, select New > DWORD (32-bit) Value, and name it NoDriveTypeAutoRun.
- Double-click it and set the value to ff to disable all AutoPlay features.
Advanced: Disable AutoPlay via Group Policy
Note: This is only available for Windows 11 Pro and Enterprise editions. It requires admin privileges.
- Press Windows key + R, type gpedit.msc, and press Enter.
- Go to Computer Configuration > Administrative Templates > Windows Components > AutoPlay Policies.
- Double-click Turn off AutoPlay and select Enabled.
- Click Apply and OK.
Troubleshooting Common Issues
Why does my Windows 11 device not show AutoPlay options? This often happens if the Shell Hardware Detection service is disabled. Press Windows key + R, type services.msc, find Shell Hardware Detection, and ensure it is set to Automatic and running. Does disabling AutoPlay improve system performance? Disabling it can slightly improve performance by preventing the system from scanning every device the moment it is connected, which is helpful if you frequently plug in drives with many files.
Summary
Changing AutoPlay settings helps you manage how Windows handles removable media. You can use the Settings app for basic changes, the Control Panel for specific device actions, or the Registry and Group Policy for advanced security. Why this matters: Properly configuring these settings protects your computer from potential threats on external drives. What to remember: Always ensure your system is backed up before making changes to the registry or group policies.
Was this guide helpful?


Tried this, and it still does not work.
[…] This post shows students and new users steps to mount and unmount a removable USB or thumb drive in the Windows Systems for Linux (WSL) environment. Windows 11 allows users to mount removable drives with ease. Simply insert a removable drive, and Windows will recognize and mount it. […]
[…] choose to upload your photos and videos from your camera to Dropbox automatically by configuring Windows’ AutoPlay settings. By default, AutoPlay prompts what to do with the camera or device you insert when you connect a […]
[…] default, Windows will automatically initiate when you insert a blank recordable CD or DVD into your optical drive. When you do that, a “Burn a Disc” window will […]
[…] AutoPlay settings in Windows allow users to choose different actions when devices are inserted or attached to a Windows […]
[…] If you want to learn more about AutoPlay, click here. […]
[…] Learn more about AutoPlay settings […]